Pages

Monday, March 30, 2015

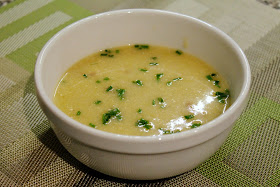
Punchier Potato-Leek Soup: Enhancing a Classic with More Flavor

Potato Leek Soup with Bacon and Buttermilk

Soon spring produce will be arriving, and I'll be switching my focus to all those wonderful fresh flavors. I'm starting to see asparagus at the grocery store, but for now, we're still mostly looking at winter vegetables.

So it's a good time for one last hearty winter soup, and potato-leek soup seems perfect. It feels like a good soup for transitioning into spring: vegetable focused and not as heavy as many other winter soups.

Yet, when I made a batch of it recently, I was disappointed. I found it too lacking in flavor. Leeks are like onions but milder and potatoes are...potatoes. They are always mild. A little bay leaf, salt and pepper just wasn't enough to satisfy my craving for bolder flavors. Was it possible to create a potato-leek soup with a little more punch but without overwhelming these two key ingredients.

I threw the question out during a recent Washington Post Free Range on Food Chat and got a lot of great responses, such as adding herbs or other spices (a no-brainer), other vegetables (like watercress or mushrooms), curry powder (a great idea I'd like to try sometime) and ham or chicken. The last suggestion got me thinking about using bacon, which goes well with just about anything, but it always a welcome partner for potatoes and onion. I figured it would work nicely in this soup.


I learned the best way to prep leeks from New York Times writer Melissa Clark. First cut off the dark green part, then slice the leek in half through the root (don't cut the root off yet). Then clean the leeks under running water, separating the layers with your hands as needed. Because the root is still intact, the layers hold together, making the leek easier to clean. Shake off the water, then slice the leeks.

For maximum bacon flavor, I used Benton's hickory-smoked bacon, which I've mentioned before is my favorite. I only needed 1/3 of a pound (4 or 5 strips) to add some nice smoky and meaty undertones. Although I pureed the soup for a smooth texture, I kept the bacon out of the soup for that step, as I wanted it in larger pieces. A search for potato-leek soup recipes with bacon led me to a great one by Food Network Kitchen, aspects of which I used as the template for the recipe below.

But bacon alone wasn't enough. I wanted some tang, so I was intrigued by J. Kenji López-Alt's Serious Eats recipe, which calls for adding buttermilk in addition to cream. Most buttermilk I see at the grocery store is reduced-fat, but Whole Foods has whole cultured buttermilk. I decided to use a little bit more of that than López-Alt's recipe called for and skip the cream. For spice, I used freshly ground white pepper and just a little bit of chipotle pepper hot sauce, which added some additional smokiness.


This soup was exactly what I was looking for. It was still clearly potato-leek soup but with a more complex flavor rounded out with smoke, tang and spice.

Punchier Potato-Leek Soup
Elements adapted from recipes by Food Network Kitchen and J. Kenji López-Alt for Serious Eats

1/3 lb. hickory-smoked bacon, cut into 1/4-inch strips
1 tbsp. unsalted butter
2-3 garlic cloves, minced
2 large leeks, cleaned and white and green parts sliced into 1/4-inch strips
2 russet potatoes (about 1 1/2 lb.), peeled and cut into 1/2-inch cubes
4 cups low-sodium chicken stock
1 cup water
1 dried bay leaf
Salt, to taste
Freshly ground white pepper, to taste
1 1/4 cup whole cultured buttermilk
1/2 tsp. freshly grated nutmeg
2 tsp. Tabasco chipotle hot sauce (optional)
Freshly snipped chives

1. Cook the bacon in a Dutch oven over medium heat until brown and crisp. Remove with a slotted spoon and set aside on a plate lined with paper towels. Drain off excess bacon fat, leaving about 1 tbsp. in the pot.

2. Add butter to pot and, when melted, add the garlic and leeks. Cook over medium heat, stirring occasionally, until softened, about 8 minutes. Add the potato, chicken stock, water and bay leaf and season with salt and white pepper. Increase heat to high and bring to a boil. Reduce heat to medium-low and simmer until the potatoes are tender, about 10-12 minutes.

3. Remove the bay leaf. Using an immersion blender, puree the soup until smooth. Alternatively, transfer the soup in batches to a blender and puree until smooth. Stir in the cooked bacon, buttermilk, nutmeg and (if desired) the hot sauce. Serve in bowls topped with a generous sprinkle of fresh chives.

Thursday, March 26, 2015

The Richmond Gimlet: A Better Version of My Classic '90s Cocktail

Richmond Gimlet

The late '90s were my college years, 1995 to 1999 to be exact. I wasn't much of a beer drinker in college. I hadn't yet discovered my love of IPA. Even during my semester abroad in London I remember drinking more cider than beer. At the time, I was more into mixed drinks, liked screwdrivers (vodka and orange juice, something I don't drink anymore).

During my senior year I started getting into cocktails, and the gimlet was the first one I learned to make. I discovered the recipe for it in Wallpaper, an art and lifestyle magazine I was into at the time. It was very simple: gin, Rose's sweetened lime juice and powdered sugar. I didn't have a cocktail shaker at the time, but I kept the gin and lime juice cold and powdered sugar dissolves in liquid pretty easily. I felt very sophisticated drinking those in my conical martini-style glasses.

Today, that recipe doesn't really appeal to me. I'm not a big fan of Rose's sweetened lime juice, although it is traditional for this drink instead of fresh lime juice (see this classic recipe from Imbibe). And I wouldn't use powdered sugar in a cocktail--I'd use simple syrup.

Researching the gimlet, I wondered what Jeffrey Morgenthaler would make of this drink. Although he didn't include it in The Bar Book, turns out his take on the gimlet is something he's rather known for. He calls it the Richmond Gimlet, a simple yet inspired pairing of gin, lime, sugar and mint. It's so simple, it's a wonder no one came up with this before. The mint is a welcome addition and I was so glad to see he prefers fresh lime juice to the bottled kind. While I might have some nostalgia for the version I made 16 years ago, I much prefer this improved recipe.


Cocktail: Richmond Gimlet
Adapted from a recipe by Jeffrey Morgenthaler

2 oz. gin
1 oz. lime juice
1 oz. simple syrup (1 part sugar dissolved in 1 part water)
8 mint leaves

Combine gin, lime juice, simple syrup in a cocktail shaker. Add ice and shake until very cold. Strain into a chilled cocktail glass.

Wednesday, March 25, 2015

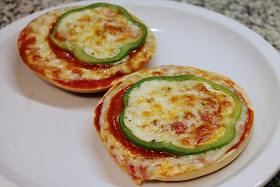
Bagel Pizzas: A '90s Snack Favorite

1990s Bagel Pizza

When I began thinking about what to feature for my week of 1990s foods, I did some research on what others recall as popular foods of the decade. Again and again I saw mentions of bagel pizzas (or pizza bagels, people seem to say it both ways).

Bagel pizza follow a similar trend from the 1980s: the french-bread pizza. Rather than building a pizza with a foundation of raw dough, you're starting with a pre-made bread product and topping it with whatever you like. It's the kind of time-saver recipe common then (and now), but with enough DIY that it feels more homemade than something popped in the microwave.

The recipe below is adapted mostly from The Frugal Girl, but I incorporated a few ideas from other sources. One recipe had the great tip of starting the pizza by placing a slice of pepperoni over the bagel's hole to prevent ingredients from falling through. Since I was using very large pepperoni slices, I cut them into quarters for this purpose. I changed the ingredients up, substituting provolone for the mozzarella and adding thin slices of green bell pepper.


Bagel Pizzas
Adapted from a recipe by The Frugal Girl

Makes 8 pizzas

4 plain bagels, cut in half
1 cup pizza sauce (store-bought or make your own, see recipe below)
12 oz. sliced or shredded provolone cheese
10 large slices of pepperoni (or 32 small slices)
1 green bell pepper, core and seeds removed, sliced into rings 1/8-inch thick
Dried oregano
Grated parmigiano-reggiano cheese

1. Preheat oven to 350 F. Place bagels evenly spaced on a baking sheet (line the baking sheet with aluminum foil for easy clean-up) cut-side up.

2. If using large pepperoni, cut two of them into quarters and place a quarter over the hole in the center of each bagel. If using small pepperoni, place one over the hole in the center of each bagel.

3. Spoon 1 1/2 to 2 tbsp. pizza sauce evenly over each bagel.

4. If using sliced provolone, place a provolone slice over each sauced bagel. If using shredded provolone, spread an even layer of cheese over each bagel.

5. Top the cheese with 1 large or 3 small slices of pepperoni and a slice of green bell pepper. Sprinkle any remaining cheese over the top (if using sliced provolone, chop the cheese into bits first). Sprinkle with dried oregano.

6. Place the baking sheet in the oven and bake until the cheese has melted, about 8 to 10 minutes. Turn on the broiler, and broil until the cheese has browned a bit, about 2 to 3 minutes more. Serve immediately with grated parmesan at the table.

Easy Pizza Sauce

1 tbsp. olive oil
1 garlic clove, minced
Pinch of red chili pepper flakes
1/2 tsp. dried oregano
16 oz. can of crushed tomatoes
Salt, to taste

Heat olive oil in a medium saucepan over medium heat. Add garlic, chili pepper flakes and oregano and sauté until the garlic is fragrant, about 1 minute. Add the tomatoes, season with salt and cook until the mixture bubbles, then reduce heat and simmer for 15 minutes.

Tuesday, March 24, 2015

Sweetgreen's Spring Menu Features Salmon, Bacon, Music


It may have snowed in D.C. on Friday, but the weather perked up over the weekend, officially ushering in spring. And that means it's time for a refresh for the menu at Sweetgreen, D.C.'s fast-casual salad chain that has expanded well beyond the D.C. area to locations around New York, Boston, Philadelphia and, coming soon, Los Angeles.

In the fall, I wrote about how the chain had changed the approach to its menu, dropping its monthly salad special in favor of a wider selection of rotating seasonal offerings. That approach continues with the new spring menu revealed today with two new salads and a vegan grain bowl.

I was eager to try the Salmon and Radish salad, made with roasted salmon, kale, arugula, beets, carrots and a mustard-oregano vinaigrette. The staff at my local Sweetgreen were very excited about this new salad when I visited last week. The salmon is very good--cooked through but not overdone and lightly seasoned. The zesty dressing complements it nicely, and I love the crunch from the radishes and beets.

Verlasso salmon. Source: Sweetgreen

The salmon salad is a particular exciting new offering for Sweetgreen. Although not sourced locally like a lot of its ingredients, Sweetgreen chose Chilean Verlasso salmon as its provider because Verlasso shares Sweetgreen's commitment to sustainability. "While developing our spring menu, we listened to feedback from guests who wanted more lean protein options that were suitable for both lunch and dinner, " says Michael Stebner, Sweetgreen's director of culinary innovation, in a statement released with the new menu. "We set out to find a new protein offering and collectively decided on salmon for its numerous health benefits."

Although some salmon farming practices are controversial, Sweetgreen notes that Verlasso's salmon was rated a "good alternative" by the Monterey Bay Aquarium Seafood Watch program. Seafood Watch is an educational effort to help consumers and businesses make seafood buying choices that are better for the environment. Seafood Watch says to "avoid" most types of imported farmed Atlantic salmon, but notes Verlasso as an exception.

Local Blue Cheese and Bacon Salad. Source: Sweetgreen.

Back on the new menu, I'm also looking forward to trying the Local Blue Cheese and Bacon Salad, made with mesclun, kale, roasted sweet potatoes, caramelized onion, honey-glazed pecans and balsamic vinaigrette. The Umami Grain Bowl--a combination of wild rice, quinoa, farro, swiss chard, roasted mushrooms, onion, roasted tofu, pea shoots, sunflower seeds and miso-sesame-ginger dressing--also sounds quite tempting. I had a small sample of the Umami bowl today and look forward to getting a full bowl soon.

Spring is going to be big for Sweetgreen in other ways. In addition to these new menu items, the chain is sponsoring Sweetlife, a 2-day music festival in Columbia, Maryland featuring Kendrick Lamar, Calvin Harris, The Weeknd, Charli XCX and more. Proceeds from the event support Sweetgreen's education program, Sweetgreen in Schools, an effort to promote healthy eating among school-age children.

This spring you can eat at Sweetgreen and really feel like you're doing something good for your body, your community and the planet. It's nice to see a fast-food chain with such lofty aspirations that also manages to deliver a delicious product. It's become a place I'm happy to frequent on a weekly basis.

Monday, March 23, 2015

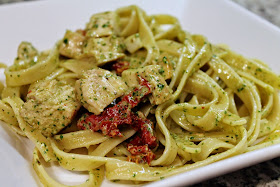
Two 1990s Food Trends: Fettuccine with Chicken, Sundried Tomatoes and Pesto Cream Sauce

Fettuccine with Chicken, Sundried Tomatoes and Pesto Cream Sauce

When foods become popular, it's rarely because they're new. Think about the things that are food trends right now--kale, quinoa, bacon, Greek-style yogurt, gelato--these are not "new" foods. They've been enjoyed by people around the world for a very long time. But they are food trends, which come about for various reasons, which were fascinatingly explored by David Sax in his book The Tastemakers.

I remember Mediterranean foods, and particularly Italian foods, as being a real trend in the '90s. People discovered there were more ways to serve pasta than just spaghetti with meat sauce or & mac & cheese and more interesting ways to make pizza. In general, there was an epiphany that great Italian food can be made with ingredients other than tomatoes and lots of cheese. One such ingredient was pesto, the green sauce that is a mixture of olive oil, nuts, garlic, parmesan and herbs--generally basil but sometimes other things.

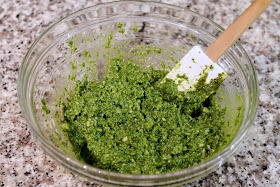
Basil Pesto
Simple basil pesto.

Pesto's roots trace back to ancient Rome, but began to resemble its familiar modern form in the 1600s around Genoa, Italy. Americans began to take notice of pesto in the 1940s with its popularity beginning to really take off in the 1980s until it was "ubiquitous," in the words of Epicurious, in the 1990s. Today it may seem commonplace, but 20 years ago, putting pesto instead of tomato sauce in your pasta or on your pizza seemed like a fresh, exciting thing to try. It heralded a comparatively "lighter" style of Italian cooking, is it was often paired with chicken and other vegetables.

Enthusiasm for pesto may have waned, but it certainly hasn't gone away. And yes, people are even making it with kale these days.

Another food trend from the '90s and one that pairs nicely with pesto was sundried tomatoes. Again, they are something that had been around for awhile, but achieved that special sweet-spot of popularity that made them a hot food trend during that decade. We all got a little carried away with them back then, using them as a pizza topping, a salad ingredient (like I did last week), a mayonnaise filler and a sandwich enhancer. I liked them best in pasta, and still include them from time-to-time. I actually would welcome their comeback, since I love tomatoes, and their concentrated flavor is a great way to add deep tomato flavor during any season.


This simple pasta recipe is classic '90s: throw together pesto, chicken, sundried tomatoes, a little cream and fettuccine and you have a dish certain to take you back 20 to 25 years that's still delicious today.

Fettuccine with Chicken, Sundried Tomatoes and Pesto Cream Sauce

Salt
1 lb. dried fettuccine
1/3 cup walnut halves
1 garlic clove, smashed
2 cups loosely packed fresh basil leaves
1/3 cup plus 2 tbsp. extra-virgin olive oil
1/3 cup grated parmigiano-reggiano cheese
3/4 lb. boneless-skinless chicken breast cutlets
Salt and freshly ground black pepper, to taste
4 garlic cloves, coarsely chopped
Pinch of red chili pepper flakes
1/2 cup chopped sundried tomatoes
1/3 cup heavy cream
Freshly ground black pepper, taste

1. Bring a large pot of salted water to boil. Add the pasta and cook according to package directions for al dente. Drain and set aside.

2. Combine the walnuts, 1 smashed garlic clove and basil leaves in a food processor. Pulse a few times to combine and chop up. With the processor running, slowly stream in the 1/3 cup olive oil and blend until the pesto has a consistent texture, scraping down the sides with a spatula if needed. Transfer the blended mixture to a small bowl and stir in the grated parmesan.

3. Heat 2 tbsp. olive oil in a large sauté pan over medium heat. Pat the chicken breast cutlets dry and add them to the pan. Season with salt and pepper and cook for about 10 minutes, turning over after about 5 minutes, until lightly browned and cooked through. Transfer chicken breasts to a cutting board and cut into 1-inch pieces.

4. Add the garlic and red chili pepper flakes to the sauté pan and cook for about 1 minute, then stir in the pesto, cooked chicken, sundried tomatoes and heavy cream. Turn off the heat and add the cooked pasta, stirring to coat in the sauce. Serve the pasta in shallow bowls.

Thursday, March 19, 2015

Black Tiger Espresso Ice Cream and Milkshake

Coffee People Black Tiger Espresso Ice Cream Milkshake

Being a teenager in Portland during the '90s meant that I was exposed to coffee shops at pretty young age. We had Starbucks everywhere, but several other local chains too, plus many, many independents.

My favorite chain coffee-shop was Coffee People, an Oregon-based chain started by Jim and Patty Roberts. By the early '90s there were a lot of Coffee People locations, including two pretty close to my house in Beaverton--one of which was a drive-thru, not a common thing back then. My favorite store of their was the location on NW 23rd Avenue, a tree-lined walkable street lined with cafes and shops that I loved to visit, especially as a high-schooler.

And my favorite treat to get at Coffee People was the Black Tiger milkshake. To this day, I don't understand why more coffee shops don't also offer milkshakes, since a coffee milkshake is an amazing thing. The shake was made with Coffee People's own Black Tiger ice cream, which I think you could also buy back then. It was unique for having coffee grounds mixed into the ice cream, giving it a grainy but not unwelcome texture. The drink was topped with whipped cream and a chocolate-covered espresso bean. As if this wasn't enough of a caffeine jolt, I believe you could get an extra shot of espresso added to it too.

Coffee People went into decline in the late '90s. The original owners sold the business, which exchanged hands before disappearing almost completely (a lone kiosk at PDX airport became all the remained)--a pretty fast decline from its peak of 40 plus stores in its heyday, according to this Willamette Week article. The blog Caffeinated PDX has a great history of the company and interview with Jim Roberts.

Lately, however, Coffee People is making a beautiful comeback. I spotted the Coffee People kiosk at the PDX airport last summer, and picked up some Black Tiger coffee (now made by Green Mountain Coffee). I hadn't noticed the kiosk for a few years. I thought it had closed, although perhaps it had just relocated to a part of the airport I never see. Regardless, it got me thinking about Coffee People and whether it could be making a comeback.

Turns out it is...sort of. Almost 13 years ago, Jim & Patty opened their own independent coffee shop, Jim & Patty's, with a lot of the same marketing touches that made Coffee People special (including the iconic catchphrase: "great coffee. no backtalk"). In 2013, Jim & Patty's expanded to suburban Beaverton, and they recently opened a third location not far from where the Coffee People I frequented on 23rd Avenue was located.

And, of course, The Black Tiger milkshake is on the menu. With the Black Tiger espresso beans I picked up in the airport last summer, I wanted to try a recreation of that classic '90s Portland treat. I made a basic espresso ice cream using the Black Tiger grounds--leaving the grounds in, of course. The ice cream is delicious on its own, but I knew I had to make it into a milkshake too. Just like it used to be served in Coffee People, I topped it with whipped cream and a chocolate-covered espresso bean, a garnish that was surprisingly hard to find in D.C. (Were they never popular in D.C.? They used to be quite common in Portland). With the weather finally starting to warm up, a good coffee shake is a great way to relax (with a bit of a jolt) on a warm day.


Black Tiger Espresso Ice Cream
Adapted from multiple ice cream recipes, notably by America's Test Kitchen and Ina Garten

1 3/4 cup heavy cream
1 1/4 cup whole milk
1/2 cup plus 2 tbsp. sugar
1/3 cup light corn syrup
1/4 tsp. salt
6 egg yolks
2 1/2 tbsp. finely ground espresso beans
1 tsp. vanilla extract

1. Combine ceram, milk, sugar, corn syrup and salt in a large (4 qt.) saucepan. Heat over medium-high heat until the mixture forms bubbles around the edges and makes a little steam (175 F on an instant-read thermometer). Remove from heat.

2. In a medium bowl, whisk the egg yolks together. With whisk in one hand, slowly pour about a cup of the warm cream mixture into the egg yolks, whisking the egg-cream mixture constantly as the cream is added. Add the egg-cream mixture back into the mixture in the saucepan, whisking to combine. Return to the saucepan to the stove over medium-low heat and cook, stirring constantly, until the mixture thickens and reaches 180 F on an instant-read thermometer (if the mixtures reaches this temperature before it thickens, remove the pan from the stove for a couple minutes, turn the heat down a bit, and then return it to the stove). The mixture should be thick enough to coat a spoon.

3. Remove the saucepan from the heat and stir in the espresso and vanilla. Allow it to cool a bit, then pour it through a fine-mesh sieve into a large (gallon-size) Ziplock bag. Seal the bag and place it in an ice water bath (this will cool it quickly if you want to churn it soon; if not, you can cool it in the refrigerator). Allow the mixture to chill.

4. When chilled, process the mixture in an ice cream maker until its texture resembles soft-serve ice cream. Transfer ice cream to a container and freeze until hard.

Black Tiger Milkshake
Inspired by the Coffee People classic

3 scoops (about 1 and 1/2 cups) Black Tiger ice cream (recipe above)
1/4 cup milk
Generous dollop of sweet whipped cream (recipe below)
1 chocolate-covered expresso bean

Add ice cream and milk to a blender. Blend until smooth. Add additional milk if it's too thick. Poor into a chilled pint glass. Top with whipped cream and a chocolate-covered espresso bean.

Sweet Whipped Cream

1 cup heavy cream
1 tbsp. powdered (confectioners) sugar
1 tsp. vanilla extract

Whisk together the cream, powdered sugar and vanilla extract until the sugar is well-combined and not lumpy. Whip the cream by hand (takes a long time) or with a stand mixer until stiff and fluffy. Alternatively, add the cream mixture to an ISI cream siphon and charge with 1

Tuesday, March 17, 2015

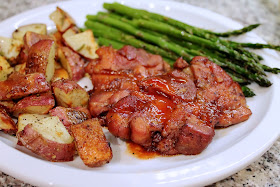
Bourbon Chicken: An Ode to '90s Mall Food Courts

Bourbon Chicken

The mall food court wasn't invented in the '90s--the first successful one opened in a New Jersey mall in the mid '70s--but, at least in Portland, the 90s was when they proliferated. Washington Square, the mall closest to my home, got its first food court during a mid-'90s renovation, but the first mall food court I remember visiting was in Pioneer Place, Portland's downtown shopping mall that opened in 1990.

Food courts were the ideal place for a teenager to get a snack. If you were too low on cash to actually buy something, there were plenty of free samples, many of which were little tastes on a toothpick. Pioneer Place's food court was ideal for snacking: it's round shape meant you could do laps picking up samples as you went (of course, I never got more than one sample, I swear).


I've mentioned The New Basics Cookbook by Julee Rosso & Sheila Lukins before, but in a week where I'm featuring foods from the '90s it bears mentioning again, as it was published in 1989 and was an important source of inspiration when I was first learning to cook in the '90s. Browsing through it this week, I stumbled upon their recipe for Bourbon Turkey, which struck me as a more refined and certainly better tasting version than what you or I may remember for the mall food court.

I adapted their recipe for boneless-skinless chicken thighs, which cook in less time than bone-in turkey parts, allowing me to reduce the roasting time. As marinated roast chicken goes, this one is pretty simple. The most complicated part is probably draining off the marinade--which converts to braising liquid--so that the glaze can go on the chicken. I did it using a turkey baster, dumping the braising liquid into a glass measuring cup.

I served the chicken with simple rosemary roasted red potatoes (recipe below) and broiled asparagus. It was delicious. Definitely better than what I remember getting from the food court so many years ago.


Bourbon Chicken
Adapted from Bourbon Turkey recipe, The New Basics Cookbook by Julee Rosso & Sheila Lukins

2 lb. boneless-skinless chicken thighs

Marinade:
1/3 cup dry red wine (I used petite sirah)
1/4 cup bourbon
1/2 cup dry sherry
2 tbsp. low-sodium tamari (or soy sauce)
1 tbsp. vegetable oil
3 whole star anise
1 tbsp. minced fresh ginger
Freshly ground black pepper, to taste

Glaze:
1/3 cup bourbon
1/4 cup honey
1/2 cup ketchup
2 tbsp. brown sugar

1. Place the chicken thighs in a large bowl. Stir together the marinade ingredients and pour over the chicken thighs. Toss to coat the chicken in the marinade. Cover and place in the refrigerator to marinate for 1 hour.

2. Preheat oven to 325 F with the oven rack about 9 inches below the oven broiler (you'll be using it later--place the rack in the middle of the oven if your broiler is separate).

3. Stir together the glaze ingredients.

4. Transfer the chicken thighs to a 9 X 13 baking dish, arranged in a single layer. Pour about half of the marinade around the chicken. Roast for about 40-50 minutes until the chicken is almost cooked through--a thermometer should read about 150 F. Remove roasting pan from the oven and drain off any remaining marinade.

5. Turn on the oven broiler. Brush the chicken with about half of the glaze. Place back in the oven under the broiler and broil for 5 minutes until the glaze has dried out (be careful not to burn it). Turn the chicken over and brush the other side with the remaining glaze. Broil for another 5 minutes. Check the chicken's internal temperature (it should be at least 165 F now). Remove from the oven and serve with any extra glaze from the pan spooned over it.


Rosemary Roasted Red Potatoes

5-6 medium size red potatoes, scrubbed and cut into 1/2 to 1 inch chunks
2 tbsp. extra virgin olive oil
2 garlic cloves, minced
2 tbsp. chopped fresh rosemary
1/2 tsp. kosher salt
Freshly ground black pepper, to taste

1. Preheat oven to 400 F.

2. Combine the cut up potatoes, olive oil, garlic, rosemary and salt in a large bowl, tossing with a wooden spoon to evenly coat the potatoes. Spread potatoes in an even layer on a baking sheet and roast until lightly browned around the edges, about 30-40 minutes. Sprinkle with pepper and serve.

Monday, March 16, 2015

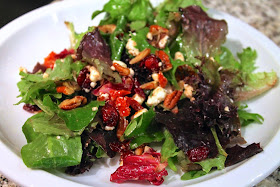
Eating Back to the 1990s: A '90s Salad

90s salad

Twenty-five years ago, it was the beginning of the 1990s, the decade of Titanic, 14 Mariah Carey #1 hits and Seinfeld. I was a 12-year-old 7th grader when the decade began and a 22-year-old college grad when it ended, making the '90s an important formative decade for me food-wise.

And I remember the '90s as an important time of change when it came to what we ate. When I think of food from the '80s, I remember a fairly limited palate, not much international influence and a lot of convenience foods. Of course, these trends persisted in the '90s, but I also remember that decade as a time when people began to "wake up" to a lot of the food concepts we hold dear today.

As my own food interests diversified, so did the available food options. Mediterranean influences really grew that decade, as olive oil became a household staple--one source states that consumption of the now ubiquitous fat grew 100 percent between 1991 and 2003. Fresh, local ingredients started to be emphasized more, even as inspiration increasingly came from far-off corners of the world. In Portland, Oregon these influences were perhaps best typified by Zefiro, Chris Israel's unforgettable cafe that merged Mediterranean tastes with Northwest ingredients (he now cooks at the delightfully German-French Grüner).

For the next 2 weeks, I'm traveling back through some of the tastes I remember from the '90s. In the days ahead, I'll be cooking with pesto, bagels and sundried tomatoes--lots of sundried tomatoes. I'll also share a cocktail that takes me back to my college days and a milkshake from a once mighty Portland coffeehouse chain that has recently been resurrected.


Today, though I'm going to start with a simple salad.

When I think back to salad from the '80s, it went something like this: iceberg lettuce with carrots, tomatoes, croutons and creamy dressing--likely ranch or blue cheese. In the '90s, salad began its metamorphosis into what's more familiar today. It was during the decade I discovered that there were other types of lettuces, like romaine or leaf, a forerunner to all sorts of greens we put in salad today. I also discovered the vinaigrette, particularly if made with the seemingly exotic dark, sweet vinegar known as balsamic, which enjoyed a meteoric rise in popularity during that time.

Sundried tomatoes are frequently packed in oil. I blot them with a paper towel to soak some of that up.

And of course, sundried tomatoes were everywhere in the '90s. I bought a jar for several recipes this week, including this salad. I'd forgotten how good they are. You can buy them packed in oil either whole or cut into julienne strips. They are packed with good tomato flavor--the kind of umami-rich tomato flavor you get from tomato paste but with more texture, even a bit of tang.

Come back tomorrow and we'll look at a cuisine that went hand in hand with '90s consumerism: mall food court food.

'90s Salad

1/3 cup pecan halves
3 cups mesclun salad mix
1/3 cup goat cheese crumbles
1/4 chopped sundried tomatoes
2 tsp. balsamic vinegar
2 tbsp. extra-virgin olive oil
Salt and pepper, to taste

1. Heat a small frying pan over medium-low heat. Toast the pecans, tossing occasionally, until fragrant, about 8 minutes. Transfer to a cutting board and coarsely chop.

2. Combine the mesclun, goat cheese, sundried tomatoes and chopped pecans in a large bowl. Whisk together the vinegar, olive oil, salt and pepper and pour over the salad. Toss to combine and serve.

Thursday, March 12, 2015

Cocktail: Martinez

Martinez Cocktail

One of the interesting aspects of learning about classic cocktails is the discovery that their recipes are not necessarily as "set in stone" as some would like you believe. Cocktail mavens often have very strong opinions about how classic drinks should be made, but their views are often just that: opinions. For every authority who insists a drink be made a certain way, I can find a similarly respected authority who does it differently.

Take the Martinez. This is a classic 19th century cocktail, a forerunner of the modern-day dry gin martini. It's made with gin, technically old tom gin, sweet vermouth, maraschino liqueur and bitters. Sounds pretty solid. But in researching this drink, I found significant variation in the gin-to-vermouth ratio, the other ingredients, the garnish and even the mixing technique among three venerable cocktail recipe sources.

The ratio of gin-to-vermouth, an oft debated subject for the modern dry gin martini, is a key variable here. In Imbibe!, David Wondrich reproduces Jerry Thomas's 19th century recipe with a 1:2 gin:vermouth ratio; in The PDT Cocktail Book, Jim Meehan shares a 1:1 equal parts recipe; and in Death & Co, the New York cocktail bar favors 2:1, so twice as much gin.

When it comes to the ratio, I'm going to side with Death & Co. Because I made the drink with Hayman's old tom gin--which is already sweetened--as well as maraschino liqueur, I don't think it needs the sweetness of more sweet vermouth. However, if you made this with Ransom old tom gin, which isn't sweetened, you might want to try the 1:1.

But Death & Co includes a more complicated recipe that includes both Hayman's and Ransom old tom gins, plus kirsch and homemade orange bitters, and I wanted something simpler. For the sake of tradition, I was hoping to like Wondrich's recipe, but it calls for shaking the drink, and given the ingredients, I really think it should be stirred. In the end, I settled for the PDT recipe but with Death & Co's gin-to-vermouth ratio.

For the bitters, I went with Boker's bitters, a modern recreation of a 19th century bitters recipe that I wrote about last year. It gives the drink a nice subtle spiciness. For the curious, here's a table showing the variations between the three recipes I've discussed above and my own that appears below:

Table: Comparison of Martinez Recipes

Component Imbibe! PDT Death & Co Me
Gin:vermouth ratio 1:2 1:1 2:1 2:1
Other stuff Maraschino liqueur,
Boker's bitters
Maraschino liqueur,
Boker's bitters
Maraschino liqueur,
kirsch, house orange bitters
Maraschino liqueur,
Boker's bitters
Mixing method Shake Stir Stir Stir
Garnish Quarter slice of lemon Orange twist Lemon twist Orange peel


Cocktail: Martinez

2 oz. Hayman's old tom gin
1 oz. Dolin sweet vermouth
1/4 oz. Luxardo maraschino liqueur
2 dashes Boker's bitters
Orange peel garnish

Combine gin, sweet vermouth, maraschino liqueur and bitters in a cocktail mixing glass. Add ice and stir until very cold. Strain into a chilled coupe glass. Garnish with orange peel.

Monday, March 9, 2015

Chicken Fried Farro

Chicken Fried Farro

One of our favorite dishes we had recently at China Chilcano was the Aeropuerto, a vegetable fried rice dish with noodles. It was so good with nicely balanced sweetness and soy-sauce saltiness. It was with that in mind that I came up with this recipe for Chicken Fried Farro, which substitutes the quick-cooking wheat grain farro for rice.

Farro is often sold semi-pearled, meaning some of the bran has been removed, which makes it cook faster. Technically this means it isn't a "whole" grain, but if such a strict definition were applied to many foods, we'd see a whole lot of "whole grain" products disappear. After it's been boiled to a chewy (al dente) texture, you can substitute it for rice in this dish and it works great.

China Chilcano's menu claims that the Aeropuerto has 20 vegetables in it. I limited mine to five (onion, celery, carrot, snow peas, scallions), but you could certainly add more or use different ones. Bell pepper, zucchini, cabbage, peas, green beans, broccoli, cauliflower and many others would be welcome. The brown sugar is optional. Fried rice doesn't have to be a sweet dish, but China Chilcano's is pretty sweet and I was aiming for a similar flavor with the sauce, made with soy sauce, red chili pepper flakes, garlic and ginger.


Chicken Fried Farro

2 cups water
Pinch of salt
1 cup pearled farro, rinsed
4 tbsp. vegetable oil
1 yellow onion, diced
2 or 3 celery ribs, diced
2 carrots, peeled and diced
1 cup snow peas, cut into thirds
1 lb. chicken breast meat, cut into 1/2-inch cubes
3 tsp. toasted sesame oil
4 garlic cloves, minced
2 tbsp. fresh ginger, minced
1 bunch scallions, white and green parts chopped separately
Generous pinch red chili pepper flakes
2 tbsp. dark brown sugar
3 tbsp. low-sodium tamari (or low-sodium soy sauce)

1. Bring 2 cups of water to boil. Add salt and farro, swirl to combine, then reduce heat to simmer. Cook the farro for about 18 minutes until cooked through but still chewy. Drain and set aside.

2. Heat 1 tbsp. vegetable oil in a large skillet over medium-high heat. Add onion, carrot, celery and snow peas. Stir-fry until tender but still crisp and not browned, about 5 minutes. Remove from pan.

3. Heat 2 tbsp. vegetable oil in the skillet over medium-high heat. Add the chicken. Let it sit for about a minute to brown, then stir. Add 1 tsp. sesame oil and stir to combine. stir-fry until cooked through, about 5 minutes. Remove from pan.

4. Reduce heat to medium. Add the remaining tbsp. of vegetable oil to the skillet, then add the garlic, ginger, white-part of the scallions and red chili pepper flakes. Stir-fry for about a minute, then add the cooked farro and the remaining 2 tsp. of sesame oil. Stir to combine, then add the cooked vegetables, cooked chicken, dark brown sugar and soy sauce. Stir to combine and reheat the cooked chicken and vegetables. Serve in shallow bowls topped with chopped scallion greens.

Thursday, March 5, 2015

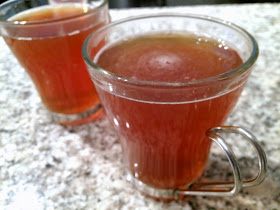
Cocktail: Smoky Tea Toddy

Smoky Tea Toddy

Sunday, when the forecast called for "wintry mix," we decided to go out for lunch. By the time we returned home--coated in a cold sheet of wet ice--we were really for a warm stiff one. So I concocted this winter warmer to thaw us out.

And today we're in the middle of ANOTHER winter storm. I know we D.C.ers have no right to complain when you compare our winter weather to the bitter windy cold of Chicago or the much heftier snowfalls of the Northeast. Yet, this winter has been our most trying since "Snowmageddon." I'm really ready for spring and I know I'm not alone.

So here's a warm winter cocktail to help make today a little easier. It's flavored with tea and honey and gets a little smoke from Laphroaig Scotch, currently my favorite way to make a cocktail a little smoky (well, that and a good mezcal).

Cocktail: Smoky Tea Toddy

Makes 2

1 cup water
1 tbsp. honey
1 Earl Grey tea bag
4 dashes Angostura bitters
2 oz. Laphroaig Quarter Cask Scotch
2 oz. bourbon

1. Combine the water and honey in a microwave-safe glass (like a 1-cup Pyrex glass measuring cup). Microwave on high 2-3 minutes until boiling. Add the teabag and steep for 4 minutes. Remove the tea bag and stir to combine.

2. Set out two glasses (you can use ceramic or tempered glass mugs). Combine 2 dashes bitters, 1 oz. Laphroaig Scotch and 1 oz. bourbon in each glass. Add half the hot tea mixture to each glass and stir to combine. Serve warm.

Wednesday, March 4, 2015

Equipment: Nonessential Tools I Can't Live Without


There are there those things no kitchen should be without: knives and cutting boards, pots and pans, measuring cups and spoons, mixing bowls, whisks and spatulas. If you were outfitting your kitchen for the first time, that's the list you would want to shop from. And if you were a minimalist, you could cook just about anything from that list.

But I'm not a minimalist, well, not exactly. I live in an apartment, so I don't have a particularly large kitchen. I generally subscribe to the idea that if I'm going to get a new kitchen gadget, it needs to be versatile. I don't have the space to store a lot of extras. Small appliances in particular are bought with care. I don't have a bread-maker or rice-cooker not because I don't think they'd be great, but I just don't have room.

That said, I do have a few more specialized pieces of equipment that I just love to pieces. Admittedly, these are "nonessentials," yet, given how much I use them, I would hardly consider them extraneous. They're the nonessentials I can't live without.

Garlic Twist
Garlic Twist

At first blush, this one might seem like the biggest gimmick of the pack. It does only one thing: minces garlic. It's the kind of thing that might be advertised in an informercial. Yet, I bet many of you have a device you use only for this purpose: a garlic press. And the garlic twist works so much better than a garlic press that I actually got rid of my press years ago. A garlic press always leaves about 1/4 of the clove behind has a large mashed chunk. The garlic twist minces the entire clove. No waste. Plus, you can control the size of the mince: twist just a few times for chunkier mince, add salt and twist many times for garlic paste. My version is one of the earliest ones; newer models feature a more ergonomic grip.


Immersion blender
Immersion Blender

This tool could be considered nonessential because it does the same thing another appliance you probably have in your kitchen can do: a blender. But there are a lot of reasons for why having an immersion blender is such a great idea. While a traditional blender is probably better for drinks, immersion blenders are wonderful tools for making purees and sauces, especially soups. Ever make a recipe for a pureed soup using a blender? It generally instructs you to transfer the soup "in batches" to a blender. This means finding (and dirtying) some sort of vessel for transporting the soup between the soup pot and the blender. Plus you need another contain to store the "batches" that have been pureed, since you can't put them back into the pot with the as-yet-to-be-pureed chunks. In short, it's a recipe for a big mess. With an immersion blender, you just stick the thing in the soup pot and press the "on" button to puree. It cleans up easily. I love it. It's perfect for soups like Sweet Potato and Soup or making sauces like mole sauce for Mole Chicken Enchiladas.


Muddler
Muddler

Sure, a muddler is designed for crushing herbs and fruit in cocktails, but the rounded end is also perfect for grinding. Lacking a proper mortar and pestle, I use a Pyrex glass measuring cup and a muddler for doing things like grinding garlic and anchovies into paste for dressing for Heirloom Tomato Panzanella or Caesar Salad.

Citrus press
Citrus Press

Sure you can use your hands to squeeze citrus fruit. But when you're making cocktails that call for a lot fruit, like margaritas, a citrus press saves not only time but your hands as well. It's more efficient and more effective. Seeds are usually too big to pass through the holes and a well designed press will keep the juice from squirting in your eye.

Oval Sauté Pan
Oval Sauté Pan

At first blush, an oval sauté pan may seem impractical. It's too large to fit over a burner, creating the potential for uneven heat. This, however, can be an advantage in certain dishes. When making chili, for example, I set one end over the burner, brown the meat in that end, then push it to the "cool" end while I brown the vegetables in the hot end. The large size is also ideal for making pasta sauce, especially if finishing the noodles in the sauce. I almost always prefer using it to my 12-inch frying pans.

Flat whisk
Flat Whisk

A standard whisk is very useful for beating eggs and mixing certain batters. But when you're making gravy, a flat whisk works much better. It's also useful for smoothing sauces like béchamel for Macaroni & Cheese.


Microplane
Microplane

The microplane is a rather cool tool, as it looks like something you'd have in a woodworking shop, yet it's practicality in the kitchen cannot be understated. It's much more effective than a box grater for fine-grating foods like parmesan, lemon zest and nutmeg.

Monday, March 2, 2015

Deluxe Appletini

Deluxe Appletini

Bright green and super sweet, the appletini is one of those cocktails that's easy to enjoy when you're new to cocktails. It goes down easy and it's simple to make: the most popular version is simply vodka and sour apple schnapps.

I drank a lot of them back in the day, but frankly, they no longer appeal to me. Not to sound too snobby about it, but I like a more refined cocktail--something that isn't so sweet and has more interesting flavors.

Yet to forgo the appletini shouldn't mean there aren't plenty of other great ways to use apples in cocktails (see the "related" links below for some great examples). For this drink, I wanted a cocktail that celebrated apples but was more refined than the traditional appletini.

Of course, an appletini isn't a real martini in the traditional sense, but we can nudge it a little closer by using gin instead of vodka. I used the Half Moon Orchard Gin that Roofers Union bartender Frank Mills introduced me to when he shared his recipe for the How Do You Like Dem Apples cocktail. The gin is made with apples as produced by Tuthilltown Spirits Farm Distillery in New York.

For the apple liqueur, I turned to Leopold Brothers, a Denver-based distillery that makes amazing gin, but also a line of liqueurs. Their New York sour apple liqueur uses a blend of sweet apples like Honeycrisps and sour ones like Granny Smith. For the ginger liqueur, I went with Bloomery SweetShine ginger liqueur from the Bloomery Plantation Distillery in West Virginia (which has, unfortunately, closed). Lastly, the bitters--technically a shrub--also contain apples. It's a celery-apple shrub from Bittermens to round out the drink.

For the garnish, I cut a very long apple peel and set it in the glass as a spiral. It doesn't really stick to the side of the glass, but even if it floats it still looks fun.

Deluxe Appletini

2 oz. Half Moon Orchard gin
1 oz. Leopold Brothers New York sour apple liqueur
1/2 oz. ginger liqueur (such as Bloomery Sweetshine)
1/4 oz. Amontillado sherry
1/4 oz. lemon juice
2 dashes Bittermens Orchard Street celery shrub
Apple spiral garnish

Combine gin, apple liqueur, ginger liqueur, sherry, lemon juice and shrub in a cocktail shaker with ice. Shake until very cold. Place the apple spiral in a chilled cocktail glass. Strain cocktail into the glass.