Pages

Thursday, January 31, 2013

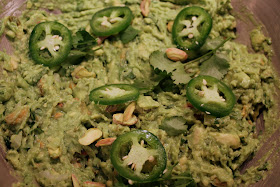
Spicy Pistachio Guacamole


Spicy pistachio guacamole

To be called guacamole, a dip should be mostly avocado and have a little salt in it. After that, there’s a lot of room for experimentation. A Mexican restaurant we frequent recently started serving a pineapple-bacon guacamole that’s pretty good. Just don’t put sour cream in it (please).

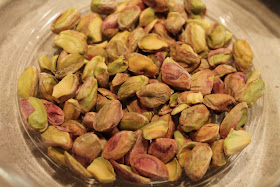
Shelled pistachio nuts

Spicy pistachio guacamole was one of the more memorable dishes we had at Empellon Cocina last year. Chef Alex Stupak makes his really spicy. I used 2 tablespoons of chopped pickled jalapeño, which makes this more of a medium, although the fresh jalapeño slices I garnished this with were extremely hot. That’s the thing about fresh jalapeño: it can be as mild as bell pepper or so hot it sets your mouth on fire.

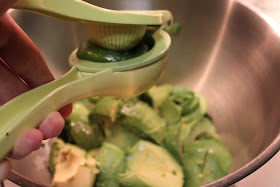
Squeezing lime juice

The crunch of pistachios, plus their green color, make them a great addition to guacamole.

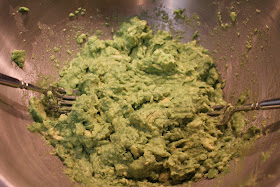
Mashed avocado

Spicy Pistachio Guacamole
Inspired by the guacamole at Empellon Cocina by Alex Stupak

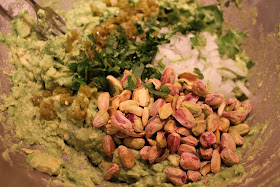
Pistachio, onion, pickled jalapeño and cilantro added to mashed avocado and lime
4 avocados
Juice from 1 lime
1/3 cup finely diced sweet onion
2 tbsp. minced pickled jalapeño
2 tbsp. chopped cilantro
¾ tsp. kosher salt
½ cup shelled roasted pistachio nuts
Sliced fresh jalapeño (for topping)

Peel avocados and scoop flesh into a large bowl. Add lime juice and mash with a fork until the mixture starts to get creamy but some chunks still remain. Add onion, pickled jalapeño, cilantro, salt and pistachios and stir to combine. Top with some sprigs of cilantro and a few slices of fresh jalapeño.

Wednesday, January 30, 2013

The Feed: January 30, 2013


The Feed is my weekly round up of interesting food-related stories from newspapers, magazines, blogs and websites.

Bon Appétit: “A Beginner’s Guide to Ramen,” by Andrew Knowlton. Ramen is all the rage these days. Bon Appétit has a useful introduction to the Japanese noodle soup, including an overview of the four main styles. Online, there’s also a good video with Chef Ivan Orkin talking about various ways to enjoy the dish.

The Boys Club: “Mixology 101: Stirring Vs. Shaking,” by Russell van Kraayenburg. I generally shake my cocktails, but this primer from the smart cocktails blog The Boys Club has me seeing the light of stirring. While it may be obvious why you wouldn’t want to shake a drink that contains tonic or prosecco, van Kraayenburg explains why stirring is appropriate for other drinks and gives detailed instructions—complete with cool animation—on optimal shaking and stirring methods.

Wall Street Journal: “The Pressure Cooker Is On,” by Kathy McLaughlin. I don’t own a pressure cooker. But after reading many times in the last year about its virtues, I’m ready to buy one. This WSJ piece does a nice job explaining why it’s so valuable and useful for so much more than just canning.

Washington Post: “Super Bowl Smackdown VII: Pizza,” by Tim Carman and Joe Yonan. Carman and Yonan go head-to-head in the Food section’s annual Super Bowl smackdown. This year it’s pizza. Carman gets a little help from 2 Amys to make Papa Peter's Super Bowl Pizza, while Yonan gets his inspiration for Sicilian Slab from Stephen Lanzalotta at Micucci Grocery in Portland, Me.

Mother Jones: “Quinoa: Good, Evil, or Just Really Complicated?” by Tom Philpott. Following in the footsteps of the recent story by The Guardian, Philpott also examines the issue for Mother Jones, taking perhaps a more nuanced look at the issue.


Tuesday, January 29, 2013

Classic Party Nachos


Nachos are one of those dishes that seem so easy that you’d think you could never get them wrong. But, surprisingly, it is rather easy to get nachos wrong, resulting in a soggy, greasy, gloppy mess. With this dish, I set out to instill some order to the chaos.


First, let’s talk about the cheese. While it’s tempting to just spread some shredded cheese across the chips and stick them in the oven or microwave, the results are rarely impressive. You usually end up sticking all the chips together and releasing a nice cheese oil slick. This sauce is really quite fantastic. It tastes like the cheese sauce of your concession stand memory, but it’s made with real cheese.

A few pulses in a food processors gives cooked ground meat even consistency.

Although I had planned this dish to be a foray into modernist cuisine, I couldn’t find sodium citrate, the compound that supposedly makes cheese sauce really smooth and stay that way. Instead, I found this Serious Eats recipe that uses evaporated milk and corn starch to make a texture as smooth as processed cheese but made with the real thing (I used a combination of cheddar and queso blanco). Although this clumps up a bit after it’s cooled a while, it’s still way smoother than making a cheese sauce with béchamel and certainly an improvement over plain melted cheese.


Next, the meat. While meat isn’t essential to nachos, I think it’s a nice add on. For this dish, I made a quick chili with some onion, pinto beans and spices. I wanted a chili that was pretty thick, so I simmered it until the bottom of the pan was almost dry, helping to keep the chili from sogging the chips. As an added precaution, I served the chili in a ramekin on the side, an optional but nice presentation.

Making the salsa in the food processor is fast and easy.

Lastly, there’s the salsa. So-called “fresh” tomatoes this time of year taste like &%*(%#, so rather than subject you to that nonsense, I used canned tomatoes, specifically Muir Glen fire-roasted diced tomatoes (which, incidentally, now come in a low-sodium variety). Fresh salsa is so simple: just combine the ingredients and pulse a few times in the food processor. Done.


This dish is really quite versatile. I could see lots of potential alterations: add roasted red pepper to the cheese sauce, serve with guacamole, use black or kidney beans, use beef or leave out the meat altogether. Design it the way you want, just be careful not to hit nacho overkill.


Classic Party Nachos

16 oz. tortilla chips, mix of white and blue corn
Smooth cheese sauce (see recipe below)
Pickled jalapeño slices
Sour cream
Clump of fresh cilantro
Nacho chili (see recipe below)
Quick tomato salsa (see recipe below)

1. Preheat oven to 200 F. Spread chips on a rimmed baking sheet and place in the oven to warm while making the other components.

2. When ready to serve, pile chips on a plate. Top with a generous ladle of cheese sauce, a few pickled jalapeño slices and a dollop of sour cream.

3. Serve nacho chili and salsa on the side in ramekins (alternatively, serve on the chips before topping with cheese sauce).

Smooth Cheese Sauce
Adapted from Cheese Sauce for Fries and Nachos, Serious Eats

12 oz. shredded cheese (I used 8 oz. of sharp cheddar and 4 oz. of queso blanco)
1 tbsp. cornstarch
1 12-oz. can evaporated milk
2 tsp. Frank’s Red Hot sauce

Combine shredded cheese and cornstarch in a large bowl, tossing to coat cheese. Heat a medium saucepan over medium heat. Add cheese mixture, evaporated milk and hot sauce. Cook, stirring occasionally until the mixture begins to lightly bubble, then reduce heat to medium-low and cook, stirring constantly until cheese has melted and mixture is smooth, about 10 minutes.

Nacho Chili

2 tbsp. canola oil
1 1b. ground turkey (dark meat)
1 medium yellow onion, diced
1 15 oz. can pinto beans
1 tbsp. dried oregano leaves
1 tbsp. ground cumin
½ tsp. chipotle chili powder
1 tbsp. Worcestershire sauce
1 tbsp. apple cider vinegar
1 tsp. smoke flavor
1 cup water

1. Heat 1 tbsp. canola oil in a large skillet over medium heat. Add turkey and cook until browned. Remove from pan to cool. Pulse in a food processor a few times to break up.

2. Heat 1 tbsp. canola oil in the skillet. Add onion and sauté until browned. Add pinto beans, oregano, cumin, chili powder, Worcestershire sauce, vinegar, smoke flavor and water. Bring to boil then reduce heat to medium-low and simmer until reduced and thick, about 10 minutes.

Quick Tomato Salsa

1 15 oz. can fire-roasted diced tomatoes
¼ cup roughly chopped sweet onion
¼ cup roughly chopped cilantro
¼ tsp. chipotle chili powder
Seasoned salt, to taste

Combine ingredients in a food processor and pulse about 10 times (1 second pulses) until combined but still chunky.

Monday, January 28, 2013

Buffalo Chicken Sliders


The Super Bowl is this weekend. Plenty of you are very excited about it. Me? I can’t even tell you who’s playing. Sorry. I was briefly interested when it looked like the Washington Redskins might have a shot at it. But then RGIII (yes, I know who that is!) suffered a terrible injury and it was all over.

So, I’m not a football fan. But that doesn’t mean I can’t appreciate a good Super Bowl party, especially for the food, which can be quite elaborate but is at its best when it’s classic and sastisfying. Something you can munch on absent mindedly. You wouldn’t want to distract from the game…too much. That might disqualify these sliders. They are pretty amazing.

My idea was to meld two football party favorites into one: sticky, spicy Buffalo chicken wings and three-bite sliders. It’s a pretty sweet deal: all the deliciousness of Buffalo wings but without the mess. Or a mini burger like you’ve never had before.


In particular, I wanted to make sure the burger patty worked well. Ground chicken can be rather bland and has a tendency to dry out. To keep this patty moist and flavorful, I infused it with the essential ingredients of Buffalo wings sauce: butter, which substitutes for the fat ground beef would have but is absent in ground chicken, Frank’s hot sauce for moisture and kick and some vinegar for tang, as well as a little garlic. No tasteless bread filling needed here. These patties are juicy and flavorful.


To offset the heat of the sauce, I threw in a sweet pickle chip. Blue cheese sauce completes the flavor from the original Buffalo wings dish, to which I added a bit of dillweed. If you can find smoked blue cheese, I recommend it, since it helps add a little grill flavor to a kitchen-made dish. Alternatively, you could add a little liquid smoke to the cheese-mayo mixture.


For the buns, if you wanted to make your own brioche, by all means go for it. But to make things easier, I used dinner rolls, not the ones labeled ideal for sliders, since I thought they were too large, but the even smaller ones that are less than two inches across. They are like three bites each, which is perfect for party finger food. Definitely a home run...er, touchdown.

Buffalo Chicken Sliders

Makes 12

12 mini dinner rolls, sliced in half
1 tbsp. unsalted butter
12 sweet pickle chips
¼ cup mayonnaise
3-4 oz. smoked blue cheese
½ tsp. dillweed
1 lb. ground chicken breast
1 tbsp. Frank’s RedHot sauce, plus extra
Seasoned salt, to taste
1 tsp. apple cider vinegar
2 tbsp. unsalted butter
2 garlic cloves, minced
2 tsp. canola oil
Celery sticks

Prepare the buns: Position oven rack 4 inches from broiler and preheat. Arrange cut dinner rolls cut-side up on baking sheet. Spread ¼ tsp. butter on each roll. Broil until toasted, about 45 seconds to a minute. Remove from oven before burning.

Make the sauce: Break blue cheese into chunks. Add to a small bowl and combine with mayonnaise and dillweed.

Cook the burgers: In a large bowl, combine ground chicken, hot sauce, seasoned salt, vinegar, butter and garlic. Form into small patties with about 2 tbsp. of mixture per patty to make 12 patties. Heat canola oil in a large frying pan over medium-high heat. Cook patties, 6 at a time, about 4 minutes per side (8 minutes total).

Assemble: Place bottom of toasted bun on plate, top with ½ tsp. blue cheese, pickle chip, cooked burger patty, extra hot sauce and top toasted bun. Serve with celery sticks, and extra blue cheese sauce and hot sauce.

Saturday, January 26, 2013

Basic Black Bean Soup


I love the Black Bean Soup recipe from Julee Rosso and Sheila Lukins' Silver Palate Cookbook. It was the first soup I learned to make as a child (not counting the Lipton instant variety). I remember thinking it was pretty incredible I could put together so many ingredients to make something so tasty.

For this soup, I wanted something inspired by the Silver Palate soup but stripped down to be simpler and healthier. In that vein, I limited the ingredients to the minimum I thought needed to make it delicious--just 11, not counting the water.


An essential element of this soup is using dried beans. Of course, in a pinch, you can use canned, but the dried beans provide such better flavor. Plus, the liquid the beans soak in gets infused with black bean flavor, so I use that for the broth instead of a chicken or vegetable stock. Thus, instead of adding those flavors, you get just more bean flavor with this soup. Plus it makes the soup a nice inky black, rather than brown.


The other key flavors here are cumin and oregano. I ditched some of the Silver Palate recipe's extra flavors which are good but less essential: sherry, brown sugar and red bell pepper. I retained the citrus, although I use lime instead of lemon, since I think the acid provides a necessary balance. I dialed back on the olive oil (the original recipe, which is double the volume of this dish, calls for a full cup of olive oil for sweating the onions, so in using just 2 tablespoons, I've basically cut that but three-fourths). And I swapped out the fussy ham hocks for leaner and easier turkey kielbasa.

Basic Black Bean Soup
Inspired by Black Bean Soup, The Silver Palate Cookbook by Julee Rosso and Sheila Lukins

1 lb. dried black beans, picked over and rinsed
2 tbsp. extra-virgin olive oil
1 large sweet onion, diced (about 1 1/2 cups of diced onion)
3 garlic cloves, peeled and smashed
1 tbsp. dried oregano leaves
1 tbsp. ground cumin
2 bay leaves
Seasoned salt and fresh ground black pepper to taste
1 14 oz. turkey kielbasa, cut into 1/4-inch thick slices
1 tbsp. fresh lime juice

1. Add beans to a large bowl (an 8-cup glass measuring cup works best) add enough water to cover the beans by a couple of inches (about the 6-cup line on the 8-cup measuring cup). Soak beans overnight in the refrigerator.

2. Heat olive oil in a large pot or dutch oven (6 quart) over medium heat. Add onion and garlic and sauté until softened, about 8-10 minutes. Add oregano, cumin, bay leaves, seasoned salt and pepper and stir, cooking a couple more minutes.

3. While sautéing onions, heat a medium frying pan over medium heat. Add the kielbasa slices and cook until lightly browned, about 6-8 minutes. Set aside.

3. Drain the beans and reserve the drained liquid, which should be about 4 cups. Pour reserved soaking liquid into pot with onions and add additional water to total 8 cups of liquid. Add beans and kielbasa to pot and increase heat to medium-high to bring mixture to a boil. Reduce heat and simmer, uncovered, for about 90 minutes to 2 hours until the beans are cooked through and softened.

4. Ladle soup into bowls and serve as is or garnish with a dollop of sour cream, slices of avocado or fresh herbs like cilantro or flat-leaf parsley.

Friday, January 25, 2013

A Walk in the Woods


Have you ever walked in the woods in the winter time? Smelled the cold scent of fir trees mingled with the smoke from a nearby cabin? This drink is an attempt to capture that moment as a cocktail.

A Walk in the Woods

1 1/2 oz. smoked whiskey (Corsair triple smoke whiskey)
1/4 oz. walnut liqueur
3/4 oz. rosemary-juniper syrup (see recipe below)
1 oz. grapefruit juice
2 dashes angostura bitters
Club soda

Combine and ingredients in a shaker with ice and shake until cold. Strain into a rocks glass with ice. Top with club soda.


Rosemary-Juniper Syrup

1 tbsp. juniper berries
2 tbsp. roughly chopped fresh rosemary
1 cup water
3/4 cup sugar

Crush juniper berries with a muddler or heavy knife. Add to medium saucepan with rosemary, water and sugar. Heat mixture over medium-high heat until it boils, reduce heat to simmer and cook syrup until it reduces to about 3/4 cup, about 10 minutes. Set aside to steep about 15 minutes then strain out the solids. Allow the syrup to cool.

Thursday, January 24, 2013

Steak with Celery Root, Cabbage and Popovers


After focusing so much on the food sections of the Washington Post and New York Times last year, I’ve been branching out and reading the food content of other newspapers. Although I knew papers for cities like Boston and San Francisco had food sections, I was surprised to learn the Wall Street Journal also has food coverage.


This recipe ran at the end of last month as part of the series “Slow Food Fast,” the idea being how to make good fast version of dishes that often take quite a long time. Gramercy Tavern Chef Michael Anthony contributed this delicious meal of pan-seared steak with celery root purée, sautéed cabbage and popovers. I made this for New Year’s Eve and it was perfect.


I made a few changes from the original recipe. I substituted ribeye steak for the sirloin, since I like the flavor better and we hardly ever have steak at home. Since I was cooking for two, I scaled the meat portion down to 1 lb., which was one steak, and used a smaller 10-inch cast iron pan instead of a 12-inch size. Be sure to use a big enough pan to not crowd the meat.


When it comes to recipe time estimates, they are almost always wrong, and this recipe was no exception. It claims to take 40 minutes. Ha! Maybe if you’re bionic. It took me close to 90 and I was working pretty constantly during that time. (For this reason, I don’t usually provide an overall time estimate for my recipes. It can vary so much depending on your personal kitchen working style, particularly food prep skills and ability to multitask. I recommend always reading through a recipe and thinking through on your own how long each task will take.)


Steak with Celery Root Purée, Sautéed Cabbage and Popovers
Adapted from Sirloin With Celery Root, Sauteed Cabbage and Popovers, courtesy of Michael Anthony for the Wall Street Journal

Serves 4

Ingredients

6 cups milk (nonfat, lowfat or whole will work)
2 ribeye steaks, each 1½ inches thick (about 2 pounds total. Note: the original recipe called for sirloin, but I used ribeye because I like the flavor better.)
Salt and freshly ground black pepper, to taste
1½ cups flour
3 large eggs
1½ tbsp. unsalted butter, melted, plus 3 1/2 tbsp. unsalted butter at room temperature
1 large celery root, peeled and cut into 1-inch pieces
2 shallots, peeled and thinly sliced
5 garlic cloves garlic, peeled and smashed
2 tsp. canola oil
Leaves from 1 rosemary sprig (may use thyme)
½ head red cabbage, cored and thinly sliced
½ tsp. cumin seeds
½ tsp. caraway seeds

1. Preheat oven to 425 degrees. Heat 2 cups of milk in a saucepan over medium-high heat until it boils and simmer until reduced by two-thirds (yielding about 2/3 cup), about 20 minutes.

2. Make the popovers: whisk together the flour, ¾ tsp. salt and 1 ½ cups milk. Beat in eggs and 1 ½ tbsp. melted butter. Add ½ tsp. butter to each cup of a 12-cup muffin tin (2 tbsp. butter total). Heat tin for 2 minutes in the oven. Remove and swirl to coat cups with melted butter, then fill each cup with batter, about a half to 2/3 full (do not overfill). Bake in oven until puffy and golden, about 15-20 minutes (note: the popovers will “fall” soon after coming out of the oven, so I’d advise not putting them in the oven until you’re making the steak).

3. Make celery root purée: Heat a 4 qt. saucepan over medium heat (recommend using one that isn’t nonstick). Add ½ tbsp. butter and sauté celery, shallots and 3 garlic cloves until the vegetables soften, but are not brown, about 3-5 minutes. Add 2 ½ cups of milk, increase heat to medium-high and bring to a boil. Reduce heat and simmer until tender, about 20 minutes. Strain vegetables, reserving the cooking liquid. Puree in the saucepan with an immersion blender, adding enough of the reduced milk (from step 1 above) to give the purée a smooth consistency. Use additional reserved cooking liquid if needed. Season with salt and pepper.

4. Make steaks: Pat steaks dry and season with salt and pepper. Add canola oil to a large skillet (I used cast iron) over medium-high heat. Once the oil begins to smoke, carefully lay in steaks. Brown both sides, about 2 minutes per side, and then lower heat to just below medium to maintain a steady sizzle. Add 1 tbsp. butter, 2 cloves garlic and the herb sprig. Continue to cook while basting steaks with butter, garlic and herbs until medium-rare, 3-4 minutes more. Discard herbs and garlic (but not the butter) and let meat rest 10 minutes before slicing.

5. While the steak rests, make the cabbage: Set steak pan back over medium-high heat. Once hot, add cabbage and cumin and caraway seeds. Season with salt and cook until slightly wilted, about 3-5 minutes. Remove from heat.

6. Serve steak sliced with celery root purée, cooked cabbage and popovers on the side.

Wednesday, January 23, 2013

The Feed - January 23, 2013

The Feed is my weekly round up of interesting food-related stories from newspapers, magazines, blogs and websites.

The Guardian: “Can vegans stomach the unpalatable truth about quinoa?” by Joanna Blythman. Quinoa is all the rage in the U.S. and other first-world nations as food-conscious consumers devour the healthy, chic grain. Blythman looks at how its meteoric rise in demand is affecting poor South Americans who once relied on the grain as a diet staple but can no longer afford it. Also worth reading: this counterpoint that ran a few days later by PETA’s Mimi Bekhechi.

New York Times: “Roasting Renders Leeks Tender and Versatile,” A Good Appetite by Melissa Clark. Times’ Dining section recipe writer Melissa Clark shares her first foray into roasting leeks, along with a recipe for Farro Salad with Leeks, Chickpeas and Currants and a helpful video on how to clean leeks.

New York Times: “Restaurants Turn Camera Shy,” by Helene Stapinski.” Oh dear. I hope I'm not in trouble. I enjoyed Stapinski’s article about how restaurants are reacting to the growing trend of amateur food photography during food service. As a food blogger, I take pictures occasionally at the restaurants I visit, although I try to be very discreet about it. I didn’t realize Chef David Chang was so against it though, or I might not have taken (these darn cool) pictures at Ma Peche.

Washington Post: “Wine choices: Are they an illusion?” by Dave McIntyre. The Post Food section’s wine columnist discusses the corporate consolidation of the American wine industry. I was rather surprised to learn that more than half of the wine sold in the United States is produced, licensed or imported by just three companies.

Washington City Paper: “Trademark Dispute Between Green Hat Gin and New York’s Greenhook Ginsmiths,” by Jessica Sidman. I was excited to pick up a bottle of Green Hat Gin, the first spirit legally distilled in Washington D.C. in generations, produced by New Columbia Distillery. Unfortunately, they’re being sued by Brooklyn-based Greenhook Ginsmiths in a trademark dispute. Frankly, I don’t think the bottles or the name are that similar, so I’m siding with New Columbia. D.C.

NPR: “Distilling Presidential History Into 44 Cocktails,” by All Things Considered. As an inauguration tie-in, NPR profiles D.C.’s Willard Hotel Bartender Jim Hewes, who has fashioned original cocktails inspired by all 44 presidents. Fox News ran a similar story, including a list of all the cocktails.

ABC Good Morning America: “Group Finds More Fake Ingredients in Popular Foods,” by Jim Avila and Serena Marshall. I learned about the adulteration of olive oil last year from Tom Mueller’s Extra Virginity. Now, ABC News takes a look at the issue of food adulteration, highlighting the release of a new database by U.S. Pharmacopeial Convention (USP), a nonprofit center dedicated to uncovering food fraud. Also covered by The Consumerist.

Tuesday, January 22, 2013

Bulgogi with Vegetables


Bulgogi, the savory-sweet Korean beef dish, is as popular as ever these days. Although usually grilled, bulgogi can be made in a skillet if winter cold or lack of equipment forces you into the kitchen.


This dish calls for using kiwi to tenderize the beef. It's unclear to me whether tenderizing is really necessary if you're using ribeye, but it adds a nice flavor to the marinade.


I found this recipe years ago on Epicurious and have made little tweaks to it. I no longer serve it with the side sauce, as I find the cooked sauce provides plenty of flavor. I’ve also added vegetables to the dish. Although some may find that sacrilege, when you consider that bulgogi is now showing up in noodle soup dishes and even tacos, it doesn’t seem that outrageous.


Bulgogi with Vegetables
Adapted from Dok Suni: Recipes from My Mother's Korean Kitchen by Jenny Kwak and Liz Fried

Makes 2 servings

1 lb. rib eye steak, thinly sliced
1/2 fresh kiwi, peeled, minced and muddled
1 tbsp. light brown sugar
Fresh ground black pepper
1 tbsp. canola oil
1 sweet onion, halved and sliced into strips about an inch long and 1/4-inch wide
1 red bell pepper, sliced into strips about an inch long and 1/4-inch wide

1 tbsp. soy sauce
1 tsp. dark sesame oil
1 garlic clove, minced
2 tsp. rice vinegar

Sesame seeds

1. Cut the fat off the steak and slice very thinly—about 1/8-inch thick (put the steak in the freezer for about 10-15 minutes before slicing). Add to a medium bowl with the kiwi and brown sugar. Massage mixture to juice the kiwi and mix with the meat. Set aside to marinate about 10 minutes.

2. Heat 2 tsp. canola oil a large skillet over medium-high heat. Add the onion and red pepper and stir fry until they are a little browned, about 6-8 minutes. Remove from pan.

3. Add the last tsp. of canola oil to pan. When hot, add the beef mixture and stir fry until the meat is cooked to the desired doneness (I recommend not cooking it until it is all brown, since that will make it tough). Return the cooked vegetables to the pan to heat. Combine the soy sauce, sesame oil, garlic, vinegar and black pepper and add to mixture. Cook another couple minutes until sauce has reduced a bit, stirring to coat evenly. Serve on plates with rice topped with a sprinkle of sesame seeds.

Monday, January 21, 2013

Ma Peche (New York)


[Update: Ma Pache closed.]

Last year, I became a Momofuku devotee. I followed news of David Chang’s expanding restaurant empire. I read Lucky Peach. I cooked Christina Tosi recipes (time for another batch of Corn Cookies).

But I hadn’t yet had the pleasure of actually dining in one of the restaurants. I have a coworker who raves about Noodle Bar. Another who dazzled me with stories of dinner at Ssam Bar. Feeling left out, it was time I rectified the situation.

So I selected Ma Peche, which is sort of the secret Momofuku restaurant. It doesn’t have “Momofuku” in the name. It’s underground, hidden behind and below a Momofuku Milk Bar store front. Last summer, when I went in to buy some cookies, I figured the space in the back was where you could go eat your Crack Pie if you wanted to sit for a bit. I had no idea it was a separate restaurant.

I wasn’t disappointed. On a trip that included hot spots The Nomad and The Library at the Public, our favorite meal was what we had at Ma Peche.

After a rather harried walk up a ridiculously crowded 6th Avenue, we were more than ready for some drinks. I had the Bruno, made with Nolet, Cynar and Punt e Mes, which I selected mostly because I didn’t know what two of those three things were (Nolet is a type of gin; Punt e Mes is Italian vermouth). Chris was particularly happy with his drink, the Drunken Pun’kin, a warm pumpkin cocktail with dark rum and walnut liqueur.

Moving on to starters, we selected a couple that promised fresh flavors. An apple salad served with celery shavings, date slivers, chopped peanuts and peanut sauce hit the spot. But the broccoli salad was even more intriguing, served with mayonnaise and smoked raisins, one of the more unusual smoked ingredients I’ve had.

The highlight was the pork chop for two with stuffing, which rivals the roasted pork dinner for two at Mintwood Place. I’d heard Ma Peche’s portions could be small, but there’s nothing small about this massive pork chop. You could probably split this three ways and still be quite sated. The bread and celery stuffing is really quite good too, but what brings it all together is the drizzle of sweet potato puree. Such a simple thing, but it’s such a great idea with stuffing and pork.

Ma Peche didn’t used to serve dessert, but now there are a few options. White chocolate with popcorn and caramel may not sound like an exciting dessert, but it was really quite tasty with just the right amount of salt to heighten the sweet.

Ma Pache, 15 West 56th Street (Between 5th and 6th Avenues in the Chambers Hotel; enter through Momofuku Milk Bar), New York City (Midtown). (212) 757-5878. Reservations: City Eats.

Ma Peche on Urbanspoon

Sunday, January 20, 2013

Salted Caramel Sauce


Usually when you burn something in the kitchen, it means you’re in trouble. But there are a few foods for which a controlled burn, that is a burn that doesn’t go too far, is exactly what you want. When you burn sugar for too long you get something rather nasty, but if you burn it just right you get caramel, one of the most delectable sweet treats.

Once the mixture begins to boil it will still be clear; you got a ways to go.

Bon Appétit’s January 2013 issue ran a fairly traditional recipe for salted caramel sauce (to accompany almond bread pudding) with one twist: a bit of cream of tartar to discourage sugar crystallization on the side of the saucepan. Although I did still get a little crystallization with this recipe, it wasn’t as much as I’ve experienced before and since cream of tartar is basically tasteless, it does no damage to the rich, burnt sugar taste you’re looking for.

Eventually it will turn honey color, but it's not done cooking yet.

The most important step in making caramel sauce is the caramelization process. This recipe boils the sugar-water mixture on medium-high heat until you get a honey colored syrup and then reduces the heat to provide better control while cooking to that desired deep amber stage.

Keep cooking until the caramel is a deep amber color.

This part can be a bit tedious. A watched pot never boils and a watched sugar-water mixture never caramelizes, or so it seems. But turn away at your folly: once it starts to brown it can go over to the dark side real fast. You’re looking for an Obi-Wan Kenobi, not a Darth Vader. Let this syrup get pretty amber, almost reddish looking, which was just right. For another visual take on this process, I recommend the Bon Appétit video.

Be careful when adding butter and cream, as they cause sputtering.

Also important is using the right pan. Since the mixture will sputter when the butter and cream are added, I recommend using a 4 qt. saucepan, since its tall sides help contain the mixture and reduce the chance you’ll burn yourself with a little splatter. If that concerns you, wear gloves while adding the dairy ingredients. I also recommend using a stainless steel pan rather than nonstick, since it’s easier to see the color changes in the sauce if the pan isn’t black.


The finished sauce should be cooled a bit and then stored in the fridge up to 2 weeks. I like to keep it in a covered glass measuring cup, since that makes it easy to warm it a bit in the microwave and pour it over ice cream, cake or other desserts.


Salted Caramel Sauce
Adapted from a recipe by Bon Appétit, January 2013

1 cup sugar
1/8 tsp. cream of tartar
3 tbsp. water
¼ cup (1/2 stick) unsalted butter, cut into pieces
½ cup heavy cream
1 tsp. kosher salt

1. In a 4 qt. saucepan, whisk together sugar, cream of tartar and water and bring to a boil over medium-high heat. Stir it a bit to make sure the sugar dissolves evenly, but then let it cook unstirred until it starts to brown, about 5-6 minutes. Continue cooking, stirring a bit, until it reaches the color of honey. Reduce heat to medium-low and continue cooking, stirring occasionally, until the mixture is a deep amber color, about another 3-4 minutes (the times really don’t matter in this recipe and they may vary depending on your range—it’s the color stages that are important).

2. Remove saucepan from heat. Whisk in the butter (carefully, since it will sputter), then the cream (again, be careful) and then finally the salt. Allow the sauce to cool a bit and then transfer to an appropriate container: a glass jar, bowl or measuring cup (don’t use plastic if the mixture is still hot). Store in the fridge for up to 2 weeks.

Saturday, January 19, 2013

Parsnip-Carrot Soup with Tahini and Roasted Chickpeas


While looking for interesting soup ideas for this week, the Smitten Kitchen recipe for Carrot Soup with Tahini and Crisped Chickpeas was too beautiful to pass up.


Roasted chickpeas are quickly becoming something I want to eat all the time. They’re great in salads and make a good snack, but I’d never heard of anyone putting them in a soup before. It’s just another of the many great ideas that typify Del Perelman’s blog.


The embellishments of this soup are like deconstructed hummus. First, there are the chickpeas, which Perelman spiced with cumin, although I chose instead to use smoked paprika.


Then there’s the tahini “dollop,” a mix of tahini, water and lemon juice that displays a curious kind of kitchen alchemy when you mix it together. Separately, these three ingredients are quite runny, but when combined, they make a remarkably thick paste. I’m not quite sure why this happens, but it’s cool to watch.


Besides the smoked paprika, my more significant deviation from the original recipe was to swap out half the carrots for parsnips, which makes the soup a little less vibrantly orange but adds a different flavor.


Parsnip-Carrot Soup with Tahini and Roasted Chickpeas
Adapted from Carrot Soup with Tahini and Crisped Chickpeas, Smitten Kitchen

Roasted Chickpeas:
1 15 oz. can of chickpeas, drained, rinsed and patted dry with paper towel
1 tbsp. olive oil
½ tsp. kosher salt
½ tsp. smoked paprika

Pita Triangles:
3 large pitas, cut into 8 equal wedges
Olive oil
1 tbsp. za’atar (a middle eastern spice blend of dried thyme, sesame seeds and salt—may substitute those ingredients if you don’t have za’atar)

Parsnip-Carrot Soup:
2 tbsp. olive oil
1 lb. parsnips, peeled, quartered and chopped into ¼-inch pieces
1 1b. carrots, peeled and chopped into ¼-inch pieces (quarter any particularly thick carrots before chopping)
1 large or 2 small yellow onions, diced
4-6 garlic cloves, peeled and smashed
¼ tsp. ground coriander
½ tsp. ground cumin
Pinch of red pepper flakes
4 cups low-sodium vegetable broth
2 tbsp. chopped flat-leaf (Italian) parsley

Tahini Sauce:
3 tbsp. tahini
2 tbsp. lemon juice
2 tbsp. water
Salt, to taste

1. Preheat oven to 425 F. In a medium bowl, combine chickpeas, olive oil, salt and smoked paprika. Spread evenly on a baking sheet (line with aluminum foil for easy clean up) and roast until chickpeas as dry and crispy, about 15-20 minutes. Stir chickpeas about halfway through to promote even roasting.

2. While the chickpeas cook or just afterwards, make the pita triangles. Spread the cut pitas evenly on a baking sheet. Spray or brush with olive oil then sprinkle with za’atar. Bake until brown around the edges, about 5-7 minutes.

3. Heat 2 tbsp. olive oil in a dutch oven over medium-high heat. Add parsnips, carrots, onion, garlic, coriander, cumin and red pepper flakes, and sauté until they begin to brown, about 15-20 minutes. Add broth, stirring to scrape up any browned bits on the bottom of the pot. Bring to boil, reduce heat and then cover to simmer, stirring occasionally, until the vegetables are tender, about 30 minutes.

4. While the soup cooks, make the tahini sauce. Combine tahini, lemon juice, water and salt in a small ball. Whisk to combine (and watch the magic of these runny ingredients quickly becoming thick).

5. Puree soup with an immersion blender or in batches in a blender until smooth. Serve in bowls topped with a dollop of tahini sauce, a handful of crisped chickpeas and a sprinkle of chopped parsley with pita triangles on the side.

Friday, January 18, 2013

The Rye in January Cocktail


This elegant cocktail is a combination of ingredients that strike me as being very "wintery": rye whiskey, the herbal-cinnamon taste of the Czech liqueur Becherovka and the pucker of grapefruit juice, rounded out with Cynar and absinthe.

The Rye in January Cocktail

3/4 oz. rye whiskey (Knob Creek)
3/4 oz. Becherovka liqueur
1/4 oz. Cynar
1/4 oz. absinthe (Absente)
1 oz. grapefruit juice
2 dashes Peychaud's bitters
Lemon twist (optional garnish)

Combine all ingredients in a shaker with ice. Shake until cold and strain into a chilled coupe. Garnish with lemon twist.

Thursday, January 17, 2013

French Onion Soup


The Washington Post’s David Hagedorn had a great article last month extoling the virtues of dishes that prominently feature onions and cheese. How can you go wrong with that? That was the headline actually, but seriously, onions and cheese are one of those culinary couples that just work, always. Like Lucy and Ricky. Fred and Wilma. Laverene and Shirley. You get the picture.


French onion soup is perhaps the most classic way to combine onions and cheese. And it sounds pretty simple: onions cooked in broth topped with toast, sprinkled with cheese and broiled.


So why’s it so hard to get it right? I’ve had French onion soup where the broth tastes like metal. Where there’s not enough onions. Where the onions are too sweet. Where the cheese is tasteless. It turns out, French onion soup isn’t as simple as it seems.


Hagedorn tinkered with the recipe to get it right, using a combination of yellow and sweet onions, since sweet onions alone were too sweet. He made the stock with the leftovers of smoked chicken, which sounds absolutely amazing, but unfortunately I didn’t have any smoked chickens on hand. Instead, I enhanced store-bought chicken broth with onions, celery, thyme and bay leaves and, here’s the kicker: bacon. Just like bacon flavored the broth for the Split Pea and Ham Soup, I thought it could also do wonders for French Onion Soup, and I wasn’t wrong. Its influence was subtle but noticeable. Smelling the broth, I could detect just a hint of smoky bacon goodness.


Otherwise, I followed Hagedorn’s recipe pretty closely. I deviated in one cooking instruction: he caramelized the onions in a large saute pan and then transferred them to a large pot. I did the caramelizing and simmering in the same pot, a dutch oven. I imagine his thinking was to do the caramelizing in a pan with more surface area so that it would go faster. Although using a dutch oven may take a little more time, I like the simplicity of using just one pot, and it helps ensure you don’t discard any wonderful onion flavor from the bits that stick to the bottom of the pan during the caramelizing. I also used only gruyere cheese instead of the mix of Gruyere and fontal in the original recipe.

French Onion Soup
Adapted from French Onion Soup by David Hagedorn for the Washington Post

Makes about 6 servings

1/2 baguette, sliced into 1/2-inch rounds
2 lb. onions, mix of yellow and sweet (vidalia), sliced in half and cut into 1/4-inch half moons
4 fresh bay leaves
2 tbsp. canola oil
2 tbsp. unsalted butter, cut into small cubes
Salt and fresh-ground black pepper to taste
8 cups bacon-enhanced chicken broth (see recipe below)
1 tsp. onion powder
1 tsp. fresh thyme leaves
1/3 cup port wine (may substitute sherry, madeira or dry vermouth)
3 cups shredded gruyere cheese

1. Preheat oven to 375 F. Spread bread slices in a single layer on a baking sheet. Bake in the oven for about 20-25 minutes until dry and light brown. Set aside.

2. Heat a dutch oven over medium heat until hot. Add onions and 2 bay leaves to pot and spread evenly across the bottom. Cook undisturbed for a couple minutes, then drizzle the oil over the onions and add the butter but do not stir for a few minutes to let them start to color on the bottom. Then stir them, season to taste with salt and pepper, and continue cooking, stirring occasionally, until the onions are golden brown, about 30-35 minutes.

3. Add remaining bay leaves, broth and onion powder and bring to a boil. Reduce heat to medium and cook for about 15 minutes, maintaining a gentle boil. Stir in the fresh thyme leaves and port wine.

4. Adjust oven rack to upper third position and preheat broiler. Place oven-proof soup crocks on a rimmed baking sheet and ladle the soup into the bowls so they are filled to 1/2 inch below the bowl rims. Float two or three toasted baguette slices on top of the soup and top with a generous half cup of shredded gruyere cheese. Broil for about 3 to 4 minutes until the cheese is melted, bubbling and a little browned. Serve soup hot.


Bacon-Enhanced Chicken Broth

1 tbsp. canola or vegetable oil
1 medium yellow onion, diced
3 stalks of celery, diced with leaves
Seasoned salt to taste
1 bunch of thyme
1 tsp. black peppercorns
2 bay leaves
1/4 lb. thick bacon
8 cups low-sodium chicken broth

Heat oil in a dutch oven over medium heat. Add diced onion and celery, season with seasoned salt and sauté until softened and aromatic, about 5 minutes. Add retained celery leaves, thyme, peppercorns, bay leaves, bacon and chicken broth. Cover, increase heat to medium-high and bring to a boil. Reduce heat and simmer, covered, for 40 minutes. Set aside to cool, strain out solids and refrigerate stock until ready to use.